


Gestionarea listelor de abonare la e-mail în HubSpot
Digitalizarea crește din ce în ce mai mult în fiecare zi. Și odată cu ea, atenția noastră se îndreaptă către afacerile online. Dacă doriți să aflați cele mai recente știri, cele mai noi tendințe în modă și cele mai noi apariții ale celebrităților, internetul este cel mai valoros instrument pe care îl puteți utiliza. Având în vedere că internetul este una dintre cele mai rapide și mai ieftine modalități de a trimite și de a primi informații la distanță, numărul de utilizatori este în continuă creștere.
Conform unor statistici privind cumpărăturile online (Cloudwards.net), în 2021, au existat aproximativ 2,14 miliarde de cumpărători online unici, din 60% din populația mondială care are acces la cel puțin un site de comerț electronic.
Prin urmare, trimiterea de e-mailuri către clienți sau potențiali clienți despre produse, servicii sau alte subiecte și actualizări este cea mai utilizată modalitate de comunicare. Comercianții online pot trimite e-mailuri dacă vă abonați la newsletter-ul lor. În acest fel, ei vor introduce adresa dvs. de e-mail într-o listă de abonare la e-mail și vă vor ține la curent.
Marketingul prin e-mail este o formă de marketing care vă ajută să creșteți notorietatea mărcii, a produselor, a reducerilor și a altor servicii în rândul clienților pe care îi aveți pe lista dvs. de e-mail.
Gestionarea abonamentelor la e-mail ale contactelor dvs.
Integrarea HubSpot cu sistemele ERP sau proprietare vă ajută să vă gestionați cu ușurință procesele. Dintre toate acestea, gestionarea contactelor este una importantă. Utilizarea platformei HubSpot vă permite să vizualizați și să gestionați contactele și chiar le oferă acestora acces pentru a-și gestiona preferințele de e-mail.
Vă rugăm să rețineți că un abonament la e-mail este legat de o adresă de e-mail. Prin urmare, ștergerea unui contact care a renunțat la comunicarea prin e-mail va duce, de asemenea, la renunțarea unui nou contact creat cu aceeași adresă de e-mail. În cazul oricărei modificări, puteți actualiza și detaliile de contact ale clientului în lista dvs. de contacte.
Dacă este necesar, puteți modifica opțiunile de abonare manual pentru un contact sau pentru mai multe în același timp.
Actualizarea abonamentelor pentru un contact individual
Utilizând contul dvs. HubSpot, puteți revizui și adăuga abonamente manual pentru un contact individual, urmând pașii de mai jos:
Vă rugăm să rețineți că un abonament la e-mail este legat de o adresă de e-mail. Prin urmare, ștergerea unui contact care a renunțat la comunicarea prin e-mail va duce, de asemenea, la renunțarea unui nou contact creat cu aceeași adresă de e-mail. În cazul oricărei modificări, puteți actualiza și detaliile de contact ale clientului în lista dvs. de contacte.
Dacă este necesar, puteți modifica opțiunile de abonare manual pentru un contact sau pentru mai multe în același timp.
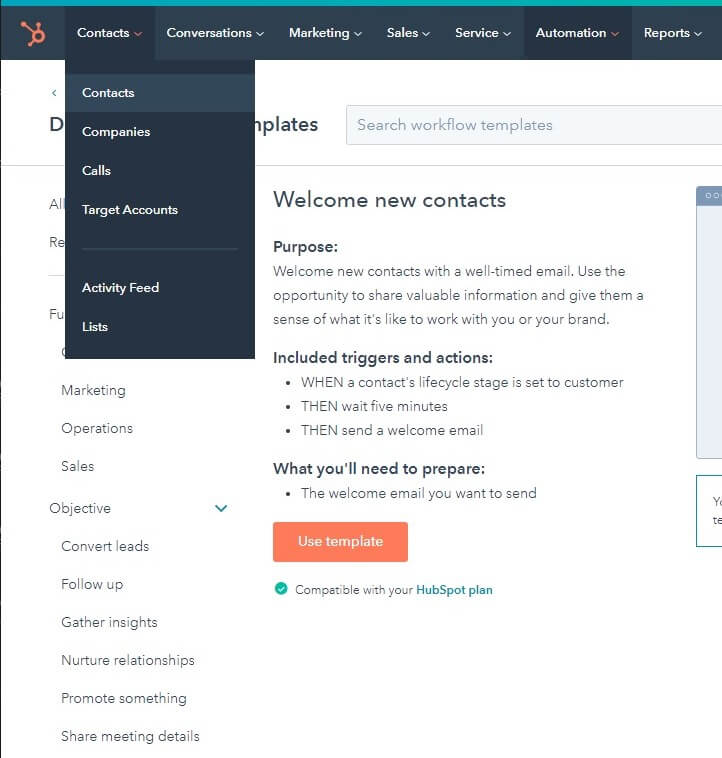
- Mergeți la bara principală din partea de sus a paginii → selectați Contacte → selectați din nou Contacte.
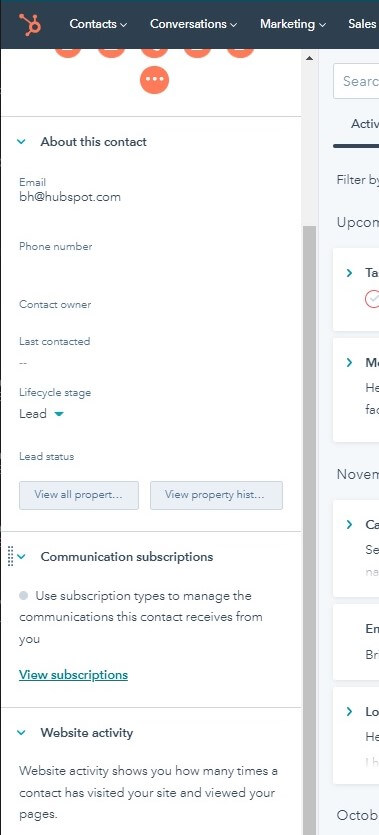
- Faceți clic pe numele contactului dorit.
- În partea stângă a paginii, sub lista „Abonamente de comunicare”, faceți clic pe butonul „Vizualizați abonamentele”.
- Privind în partea dreaptă a paginii, veți vedea lista abonamentelor curente ale contactului selectat.
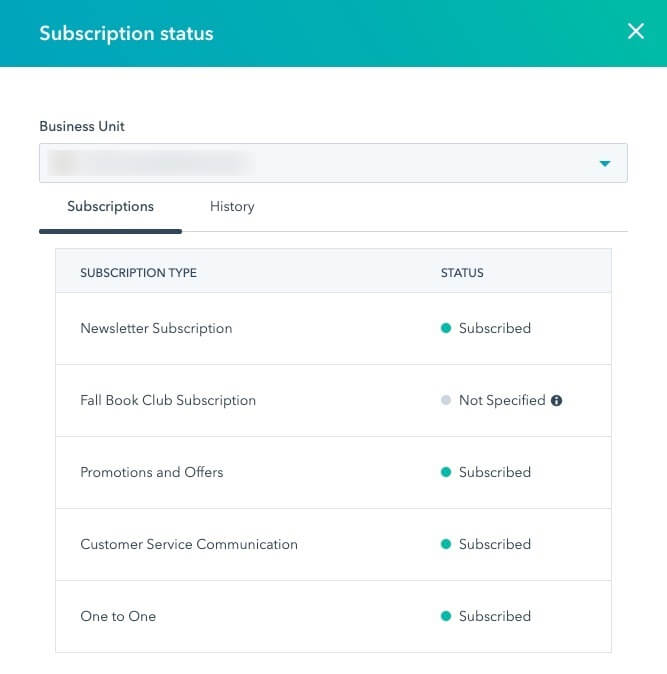
- Dacă aveți add-on-ul Business Units, puteți filtra abonamentele contactului după unitatea de afaceri. Puteți face clic pe meniul derulant Business Unit și selecta o unitate de afaceri.
- Dacă faceți clic pe fila Istoric (lângă lista de abonamente), puteți revizui dintr-o privire istoricul activității de abonare a contactului. Acesta este actualizat în timp real.
- Pentru a abona sau reabona manual un contact la un anumit tip de abonament:
-
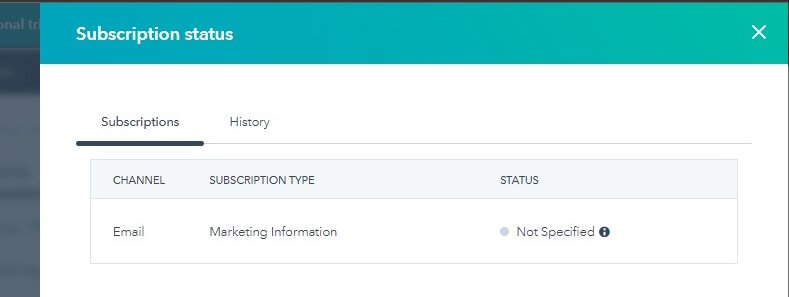
Treceți cu mouse-ul peste tipul de abonament:
- Dacă contactul nu și-a specificat încă preferința de a primi e-mailuri pentru abonament, faceți clic pe Abonare.
- Dacă contactul a renunțat anterior la primirea de e-mailuri pentru tipul de abonament, îl puteți reabona făcând clic pe Reabonare.
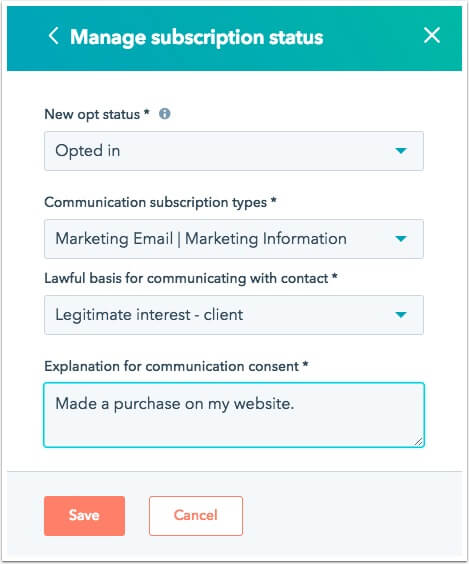
- În caseta de dialog, faceți clic pe meniul derulant Tipuri de abonament de comunicare, apoi selectați un tip de abonament.
- Selectați o bază legală pentru comunicare și introduceți explicația pentru consimțământul comunicării. În plus, va trebui să adăugați și o bază legală pentru procesare pentru a urmări și stoca detaliile contactului în baza de date.
- Faceți clic pe Salvare.
-
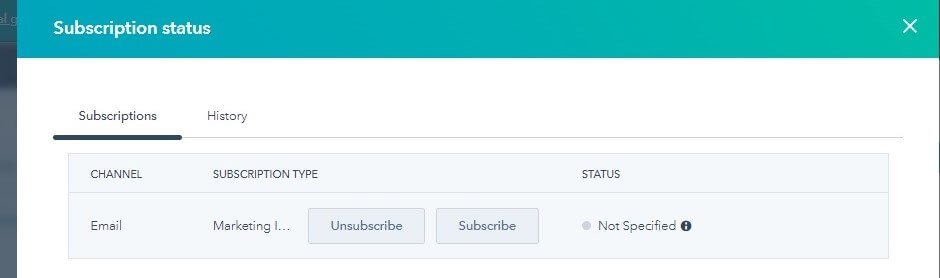
Treceți cu mouse-ul peste tipul de abonament:
- Dacă doriți să dezabonați manual un contact de la un abonament, treceți cu mouse-ul peste abonament, apoi faceți clic pe Dezabonare.
Actualizarea abonamentelor pentru mai multe contacte
Puteți, de asemenea, să gestionați abonamentele pentru mai multe contacte în același timp, urmând pașii de mai jos:
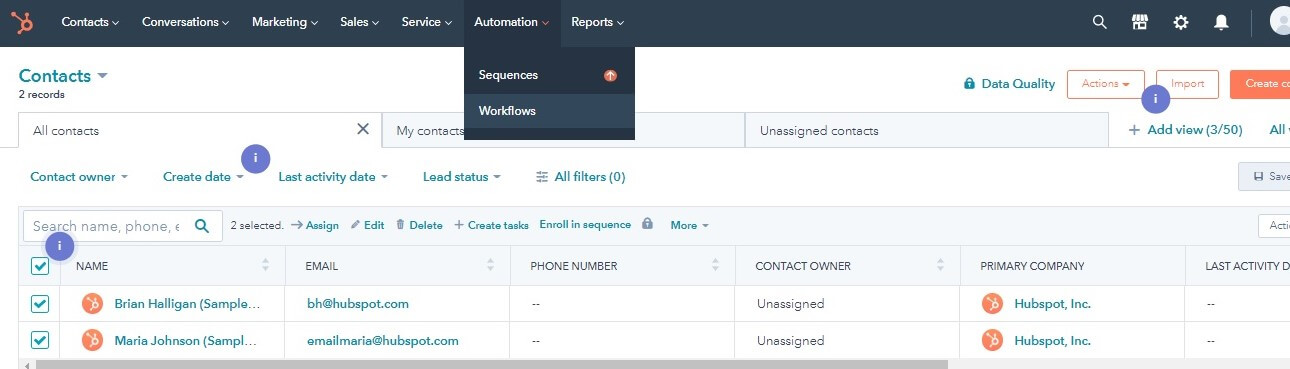
- În contul dvs. HubSpot, navigați la Contacte > faceți clic din nou pe Contacte.
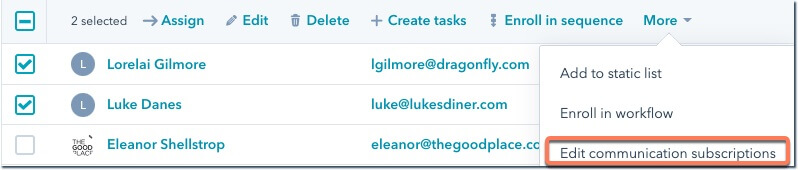
- Selectați casetele de selectare de lângă înregistrările pe care doriți să le editați în tabel (prima coloană a tabelului).
- Faceți clic pe meniul derulant Mai mult, apoi selectați Editați abonamentele de comunicare.
- Privind în partea dreaptă a paginii:
- Faceți clic pe meniul derulant Tipuri de abonament de comunicare, apoi selectați un tip de abonament.
- Selectați starea abonamentului contactelor.
- Dacă au fost dezabonați de un utilizator HubSpot, îi puteți reabona selectând opțiunea Eliminați renunțarea la toate e-mailurile.
- Introduceți o Explicație pentru consimțământul comunicării pentru aceste contacte.
-
Dacă aveți funcționalitatea GDPR activată:
- Selectați starea de opt-in a contactelor.
- Selectați o bază legală pentru comunicarea cu un contact și introduceți o Explicație pentru consimțământul comunicării pentru aceste contacte. Va trebui, de asemenea, să adăugați o bază legală pentru procesare pentru a urmări și stoca detaliile contactului în baza de date.
- Faceți clic pe Salvare.
Actualizarea stării abonamentului cu un flux de lucru în HubSpot
Utilizând contul dvs. HubSpot, puteți crea, de asemenea, un flux de lucru pentru a vă ajuta să actualizați starea abonamentului contactelor. Puteți urma pașii de mai jos:
- Mergeți la bara principală din partea de sus a paginii → selectați Automatizare → selectați Fluxuri de lucru.
- Faceți clic pe Creați flux de lucru.
- Selectați un flux de lucru bazat pe contacte, apoi faceți clic pe Creați flux de lucru.
- Faceți clic pe pictograma creion, editați și introduceți un nume pentru fluxul de lucru.
- Faceți clic pe Setați declanșatori de înscriere pentru a selecta contactele pe care doriți să le înscrieți.
- Apoi faceți clic pe pictograma plus creion + pentru a adăuga acțiunile fluxului de lucru.
- Sub Gestionarea proprietăților, selectați acțiunea Gestionați starea abonamentului la e-mail.
- Faceți clic pe meniul derulant Stare nouă de optare pentru a selecta o stare de optare.
- Faceți clic pe meniul derulant Tip de abonament de comunicare, apoi selectați un tip de abonament.
- Dacă aveți funcționalitatea GDPR activată, selectați o bază legală pentru comunicare și introduceți explicația pentru consimțământul comunicării. În plus, va trebui să adăugați și o bază legală pentru procesare pentru a urmări și stoca detaliile contactului în baza de date.
- Faceți clic pe Salvare.
- Adăugați orice acțiuni suplimentare la fluxul de lucru.
- Faceți clic pe fila Setări și editați setările fluxului de lucru.
- După ce terminați, în partea dreaptă sus, faceți clic pe Revizuire, apoi pe Activare.
Proprietățile contactelor în HubSpot
Când vă uitați la un contact din lista dvs., nu este vorba doar de detalii de contact. Este vorba și de proprietățile setate pentru aceste înregistrări. Aceste proprietăți dețin fiecare informație pe care o cunoașteți despre prospecții, lead-urile și clienții dvs. Odată ce setați o nouă valoare pentru o proprietate, întreaga listă de contacte o va moșteni pe cea nouă. Acesta este unul dintre beneficiile integrării HubSpot cu sistemele ERP sau proprietare.
Pentru a crea o proprietate nouă, urmați pașii următori:
- Mergeți la bara principală din partea de sus a paginii → selectați Contacte → selectați din nou Contacte.
- Faceți clic pe numele contactului dorit.
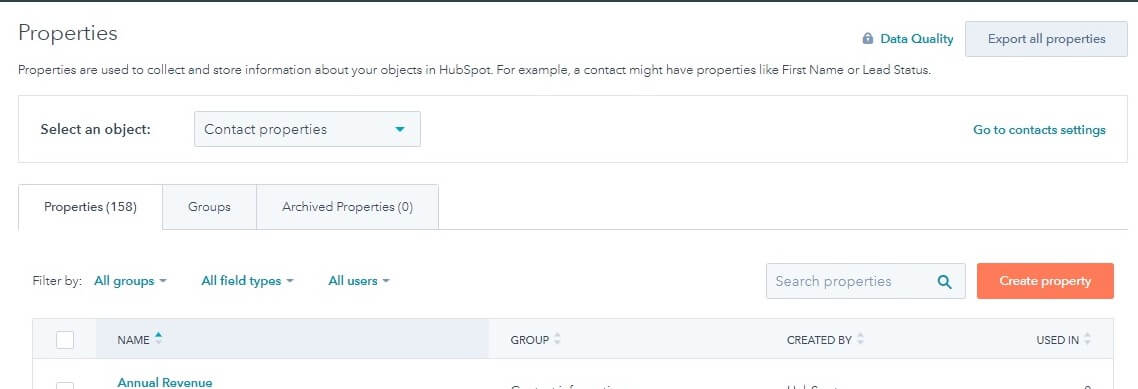
- În partea stângă a paginii, deasupra listei Abonamente de comunicare, faceți clic pe butonul vizualizați toate proprietățile.
- Pe noua pagină, în partea dreaptă, faceți clic pe butonul Gestionați proprietățile.
-
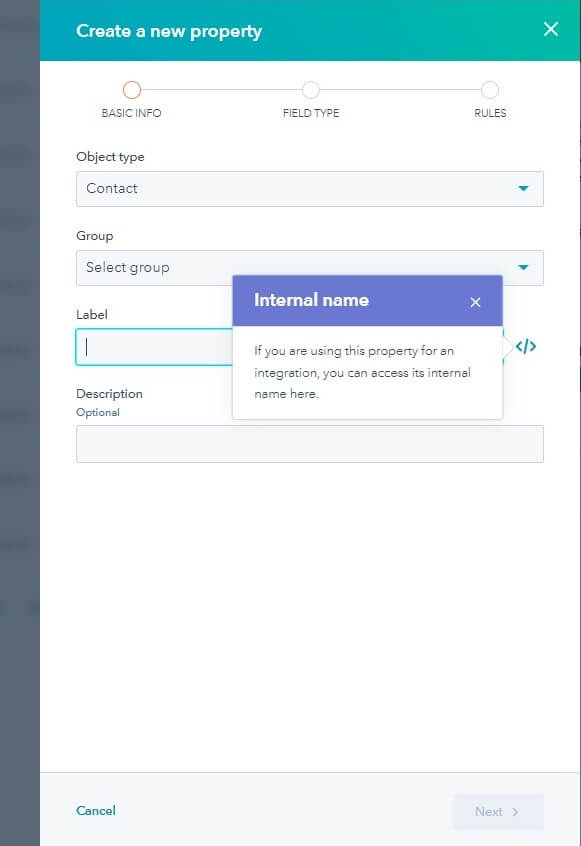
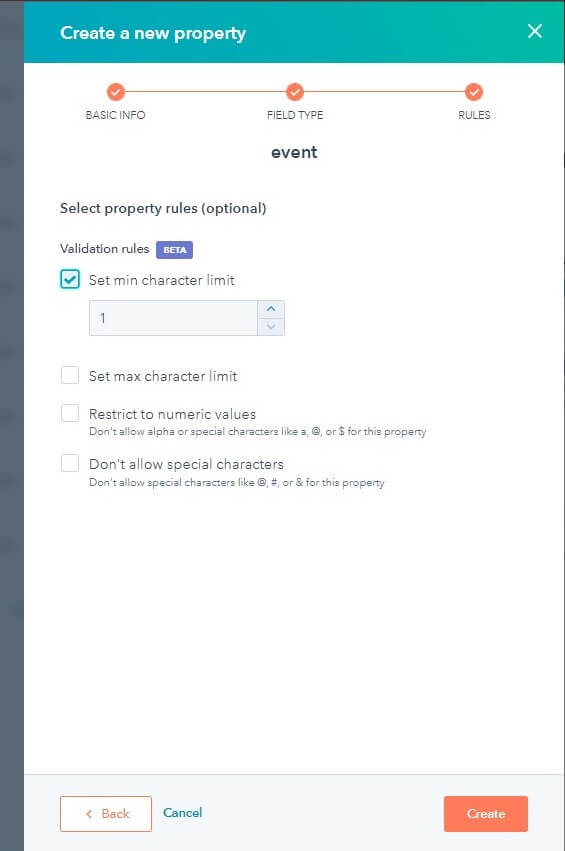
Dacă doriți să creați una nouă prin completarea câmpurilor personalizate, faceți clic pe butonul Creați proprietate.
- Completați câmpurile, apoi apăsați Următorul.
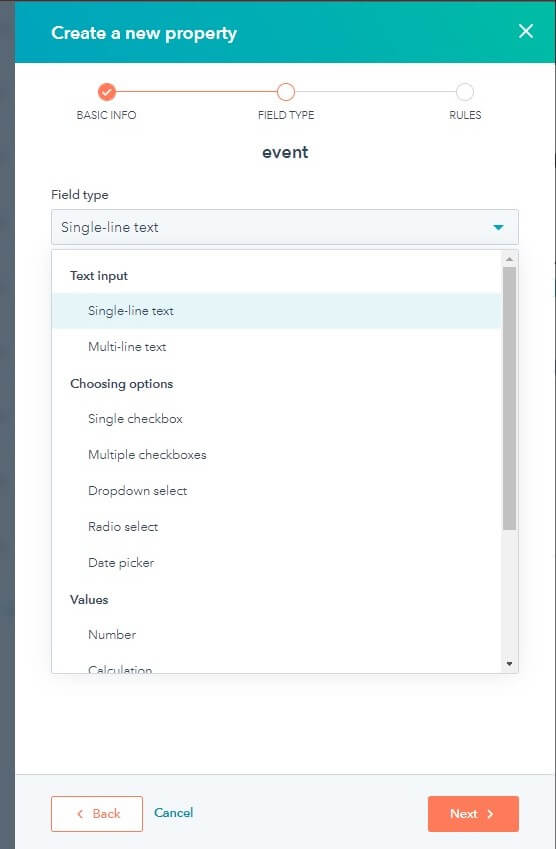
- Completați câmpul tip de câmp din lista derulantă.
- Selectați regulile pentru acesta.
- Faceți clic pe butonul Creați. După aceea, un mesaj de confirmare va fi afișat pe ecran.


![[UPDATE] Ce proiect R&D a adus OPTI Premiul de Excelență ANIS 2026?](/images/new-post/small_long-anis-2026-finalist-rd-program-ai-b2b.jpg "[UPDATE] Ce proiect R&D a adus OPTI Premiul de Excelență ANIS 2026?")