In the digitalization era, each company must have a website that contains different information for the audience. When creating a website, you need to gather and analyze more data to ensure that your website fits the current market's desires when discussing looks and content.
When you visit a website, you look at more than just the content, photos, general appearance, or if it is easy to navigate. You are also interested in how easy the words are to read and understand. Therefore, the fonts you use for your website to highlight, emphasize, or direct the eye to specific messages are fundamental.
Website fonts
We, as people, are attracted to what we see. Therefore, marketing tools, materials, or advertorials focus on attracting the eye to the main message. The same happens with the fonts we use, their size, color, and position on the web page.
- Font size
The fonts help us define a hierarchy of the content: we use bigger fonts to highlight the title and smaller ones for the sub-title. The smaller the font used, the less important the information. - Color
Their color helps us spotlight the primary word that needs to stand out from the “crowd”. Using contrasting colors might direct the viewer's attention to the critical information on your website. - Types
Rich content is helpful, but sometimes it can confuse the readers and might miss the main message. Using different font types helps you categorize your website and allows the viewer to navigate easier.
Using fonts in HubSpot
HubSpot CMS brings at your disposal a variety of fonts that you can use when creating your website. According to the HubSpot website, these are available depending on the content and font type. Part of them are available in all content editors, while others have additional restrictions:
Font type
| Content type | Font type | ||
|---|---|---|---|
| Default fonts | Web fonts | Custom fonts | |
| Page - starter templates | ✓ | Available on the Design tab of the content editor | Not available |
| Page - theme templates | ✓ | Available in theme settings and via stylesheet | Available via stylesheet |
| Page-coded template | ✓ | Available via stylesheet or custom module | Available via stylesheet |
| Blog | ✓ | Available via stylesheet or custom module | Available via stylesheet |
| Some default fonts are not available in the drag-and-drop email editor | Available for custom-coded email templates only; not supported in most email clients | Available for custom-coded email templates only; not supported in most email clients | |
| Knowledge base | ✓ | Available on the Design tab of the template editor | Not available |
| Custom Module | ✓ | Available for custom modules not used in emails | Available for custom modules not used in emails |
| CTA | ✓ | ✓ | ✓ |
Source: https://knowledge.hubspot.com/website-pages/use-fonts-in-hubspot
HubSpot CMS allows you to select fonts from a default list of fonts, Google fonts (for your website), or upload the ones you have created for your business.
Using fonts in HubSpot
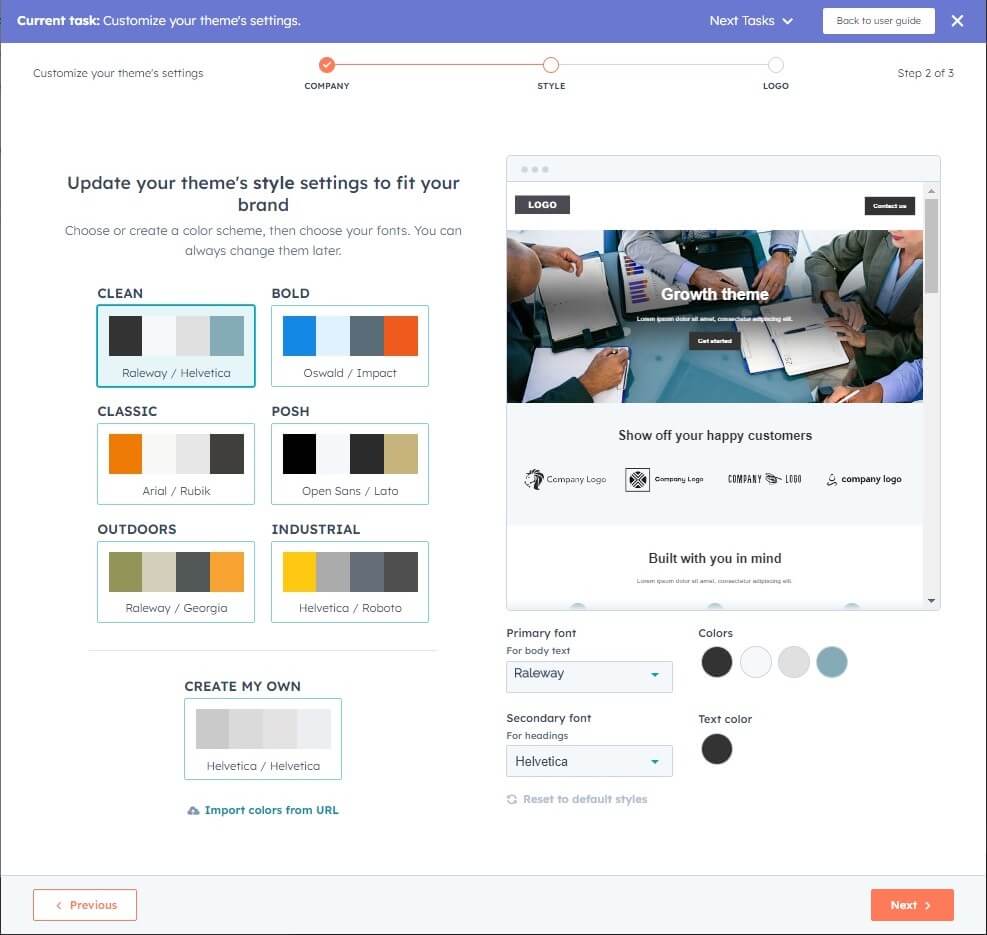
To use the default font, which can be loaded on most platforms and devices, follow the next steps:
-
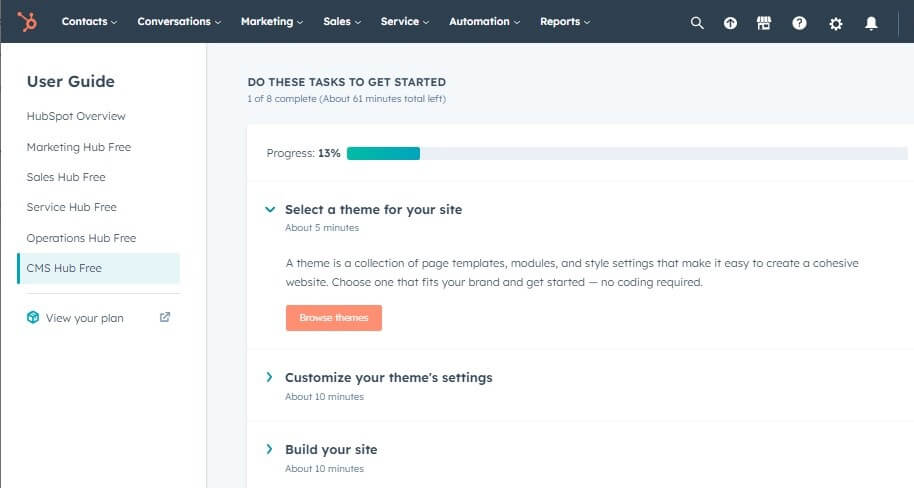
Create a website
- Select a theme for your site
- Customize your theme's settings
- Click the button Next.


-
Edit a website page/ landing page/ blog/ content:
-
In your HubSpot account, go to your content:
- Marketing → Website → Website Pages.
- Marketing → Landing Pages.
- Marketing → Website → Blog.
- Service → Knowledge Base.
- Marketing → Email.
- Hover over the content you want to modify and click the button Edit.
- In the content editor, click a rich text module.
- In the rich text toolbar, click the Font dropdown menu and select a font.


-
In your HubSpot account, go to your content:
Google fonts
Even though HubSpot allows you to select from various fonts, you can also use third-party services such as Google Fonts. For this, you must:
- Copy the font's import code
- Past it into the page's stylesheet
- Apply it through CSS
Follow the next steps:
-
Go to fonts.google.com.
- Type the font name into the search bar.
- Select the font name to view a list of styles available to import.
- Next to each style you want to import, click + Select this style.
- In the right panel, select @import in the Use on the web section.
-
Copy the font's code:
- In the Use on the web section, copy the @import code without the <style> tag.
- In the CSS rules to specify families field, copy the code for setting CSS rules.
- You can add it to your HubSpot account.
-
In a stylesheet
- Copy the font's @import code from Google Fonts.
- In your HubSpot account, navigate to Marketing → Files and Templates → Design Tools.
- Open the stylesheet used for your content.
- Paste the @import code into line 1 of the stylesheet.
- Add the code for setting CSS rules to the appropriate selectors in the stylesheet.
- Click Publish or Update to take your changes to the live version.

-
In a form
- Go to Marketing → Lead Capture → Forms.
- Hover over the form name and click Actions → Edit form or Create a new form.
- Click the Style & preview tab in the form editor.
- Click the Style section in the left sidebar menu.
- In the Text section, click the Font family dropdown menu and select a Google Font.
- In the top right, click Update or Publish to take your changes to live.


Add custom fonts
You already have a default list of fonts set by HubSpot. If you want to use different ones than those available, you can use the font field to add web fonts to your theme and custom modules. You need to have developer skills or contact a specialist for this one.
To use this option, you need to have an account with access to the design manager module, and it needs to be applied with CSS. Ensure that the files you upload are a minimum of the .woff, .ttf, & .eot versions of the font so they can be loaded on all browsers
Please note that the fonts you upload will not be found in the styling dropdown menu in the content editor.
Follow the next steps:
- Go to Marketing → Files and Templates → Files.
- Click Upload files.
- Select the font files from your computer.
- Click Open.
- Click the name of an uploaded font file.
- In the right panel, click Copy URL to copy the URL where the file is hosted. You will need the URL for the font in each file format.


