Note: This article is over a year old. Some information may be outdated. We recommend reading the latest documentation or talking to one of our experts.
In the last few years, chatbots have become one of the most popular
channels for customer service inquiries. Clients can quickly receive an
answer to their demands without engaging in communication with a real
person. This reduces the workload on the company’s service teams.
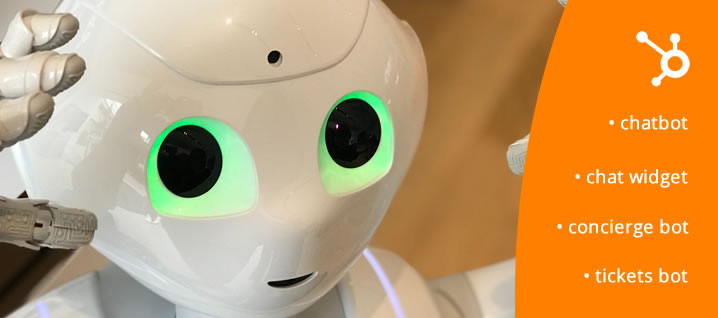
Hubspot has a powerful chat builder that helps your organization automate
live chat conversations. You can seamlessly create a bot to connect to your
website visitors. This will appear like a chat widget on the page.
Where to start with the Hubspot chatbot? Let’s detail a the process of
implementing the chatbot and what templates you can use to get started
fast.
Steps in setting up a chatbot in Hubspot
As many of us know, Hubspot is a very intuitive and user friendly platform.
However, when it comes to chatbots, there are a few initial setting to
execute before building the scenarios and launching the bot on the website.
Connect a chat channel to the conversations inbox: From the Settings menu,
navigate to Inbox > Inboxes and select the inbox you want to connect the
channel to. Click Connect a channel and then select Chat. From here you can
customize the color of the widget, the name or the avatar that appears at
the top of the widget, and the welcome message that will appear when a user
first starts a chat. Don’t worry if these details are not the final
settings, you will be able to make similar edits when setting up each chat.
Selecting the chatbot. You can build a bot from scratch or use one of the 6
different templates. Furthermore, you can customize your bot actions by
adding multiple if/then branches to establish the workflow of the
conversation.
Chatbots templates in Hubspot:
Concierge Bot: You can use this when you want to direct the visitors to a
specific team, based on their problem. Based on the response you can search
the knowledge base or book a meeting with a team.
Qualify Leads Bot: This template is used when you want information about
the guest and the reason for their visit.
Tickets Bot: This bot gathers information about the support inquiry of the
user and creates a ticket to track the issue
Knowledge Base & Support bot: You can share knowledge-based articles
with the guests. If they still need help you can give them the option to
contact a team or submit a ticket.
Meetings Bot: Use this bot to share a meeting link with a visitor so they
can book a time with the team
Offline bot: If your organization is providing support during specific
hours, you can collect the visitor’s email when the team is offline. Also,
you can display this widget only when your team is offline
You can also send a customer satisfaction survey from the chat widget. This
is very important in improving the chatbot’s overall performance. When the
conversation with the chatbot ends, the survey will appear. As the form is
being completed, the survey responses will appear on the survey detail
page, allowing businesses to learn more about the user experience.
Final thoughts
Building a chatbot using Hubspot is great especially when you are already
using Hubspot as your CRM or for marketing and sales operations. It is
really easy to set up and it’s a great tool for upgrading your customer
experience and providing a great marketing and communications platform. If
you want to implement chatbots for your business, OPTI can assist you in
implementing the right tools in a cost-effective manner. Reach out today!
Steps Overview
Step 1: Choose the Chatbot Type
In your HubSpot account, navigate to Conversations > Chatflows. Choose a pre-built template, such as the 'Qualify leads bot' to qualify visitors, or the 'Support bot' to create support tickets.
Step 2: Build the Conversational Flow
Using the visual editor, customize the questions the chatbot asks. You can use multiple-choice options or open text fields to collect information.
Step 3: Add Actions and Logic Branches
Configure actions based on the answers. For example, if a visitor requests a quote, create an action to assign them an owner from the sales team or to set a CRM property for them.
Step 4: Define Display Conditions (Targeting)
Decide on which pages of your website you want the chatbot to appear (e.g., only on the pricing page) and for which type of visitors (e.g., only for new visitors, not existing customers).
Step 5: Publish and Test
Activate the chatbot and test it on your website to ensure the conversational flow works as expected and that the data is being saved correctly in the HubSpot CRM.
Quick Questions
What is the TLDR (conclusion)?
HubSpot's chatbot tool is fully integrated with the HubSpot CRM, meaning every conversation is automatically logged on the contact's timeline. This provides your sales and service teams with complete context, enabling a seamless and personalized customer experience.
What technologies and methodologies are involved?
Technologies: HubSpot (Chatbots, CRM, Workflows) Methodologies: Customer service automation, Lead generation, Support ticket management, Conversational marketing
Why does ChatGPT fail in B2B? Discover how Hybrid AI Architecture (neuro-symbolic) protects data and combines neural networks with strict business rules for distribution, manufacturing, and B2B.
Major 2025-2026 updates to Vertex AI Search for commerce: Conversational Search API, Merchandising Console with Agentic Explainability, and UCP readiness. Case studies from Toolstation and Grupo Casas Bahia. Hybrid ERP integration by OPTI Software.
BeeGlobal & System2 conference in New York, April 28, 2026. Marian Călborean (OPTI Software) presents hybrid AI architecture and guardrails in Google Cloud. In-person event in Manhattan.


 – Google's Managed AI Recommendations Solution")
")